 It’s been a while! The past month, I’ve been working on Wick3d a lot (done quite a bit, but sadly I can’t show anything yet ;) ) until I became swamped with work so free time was pretty much non-existant. (Except for last week, when I decided to kick back and play Gears of War 2. Yes, it rocked.)
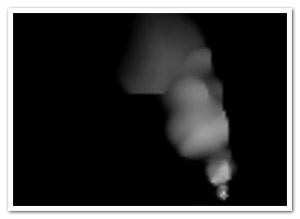
The last two days, however, I’ve been reading up on some fluid/gas dynamics a bit and tried to do some experimentation with it, loosely inspired by Mick West’s article. First attempts using FP9-only scripting slowed down to a crawl but luckily Pixel Bender showed a valuable companion in tough times!
I’ll try to explain briefly what’s happening here. There’s two BitmapData’s in play: one flowData and one containing the actual greyscale smoke (the destination buffer). The flowData buffer contains information about the velocity and density of the smoke field, and it is where Pixel Bender does its thing. X and Y velocities are encoded in the red and green channels respectively, density in the blue channel. The destination buffer is merely a per-frame copy of the flowData’s blue channel over the three colour components.
One main aspect of fluids and gas, is that gas in a high-pressure region will travel to low-pressure regions, ie: the velocity of a gas particle will be drawn towards this lower pressure region. To imitate this, the densities of the immediate 4 neighbours of the pixel are sampled from which a horizontal and vertical difference is calculated. This difference (the local pressure) is added to the pixel’s X and Y velocities.
Instead of determining the next position of the current pixel, we will inverse the velocity to approximate which pixel will end up in the current position and set its density to the current pixel. Finally, it is decremented by a very small amount to simulate dissolving smoke.
A pretty fun experiment, but not without issues. Performance could be improved for sure, and when tweaking certain variables it can get a bit instable. Nonetheless I think it’s worth sharing :)


Hi David, your smoke is ugly ))). I looked it with FP10. It looks normally with static mouse position, but with moving mouse the smoke has quadratized form )). I sent mail for you with some text.
Haha you’ve got a point ;) But with smoke, the source doesn’t tend to jump around a lot. It can be made to look different however, by tweaking some settings. Also, the smoke is scaled up in this case, to create larger patches (and improve performance), so scaling it down would probably look better :)
Pingback: Smoke dynamics in Pixel Bender - part II | Der Schmale - David Lenaerts's blog
how do you replace that black background with something transparent?
Marius: In SmokeBitmapData::update, you could replace the three copyChannel lines by:
fillRect(rect, 0xffffff);
copyChannel(_flowData, _rect, _origin, BitmapDataChannel.BLUE, BitmapDataChannel.ALPHA);
and in the constructor (SmokeBitmapData::SmokeBitmapData), replace the “false” in the super(…) call by true.
Hope that helps!